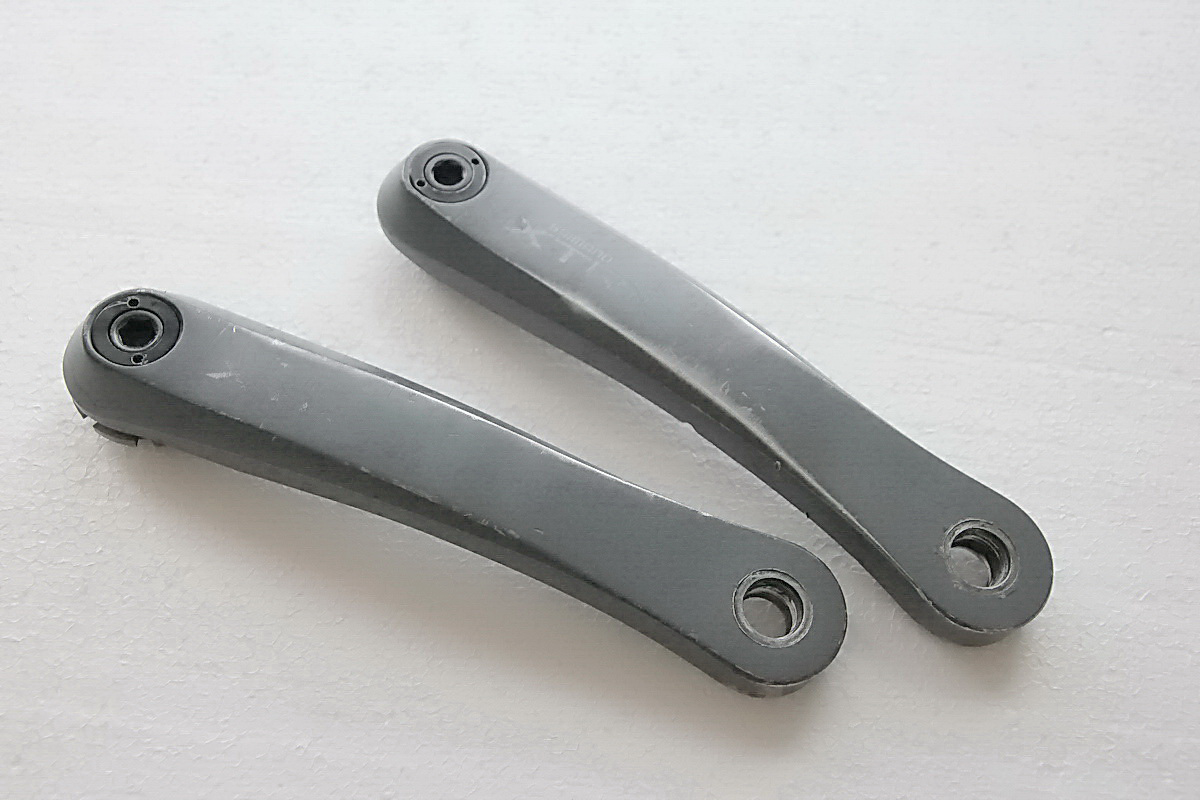
Some people asked me about my restorations of the Shimano XTR crankset I`ve done so far. Crankset restoration is actually requested more than others because there`s nothing to do more than a new facelift (...and that`s cool). Well, I decided to respond to these requests and write a short how-to story with some description of the steps I usually do. I got another opportunity to restore the XTR crankset, so go for it. Great, welcome to my how-to story about Shimano XTR FC-M952 crankset radical restoration.
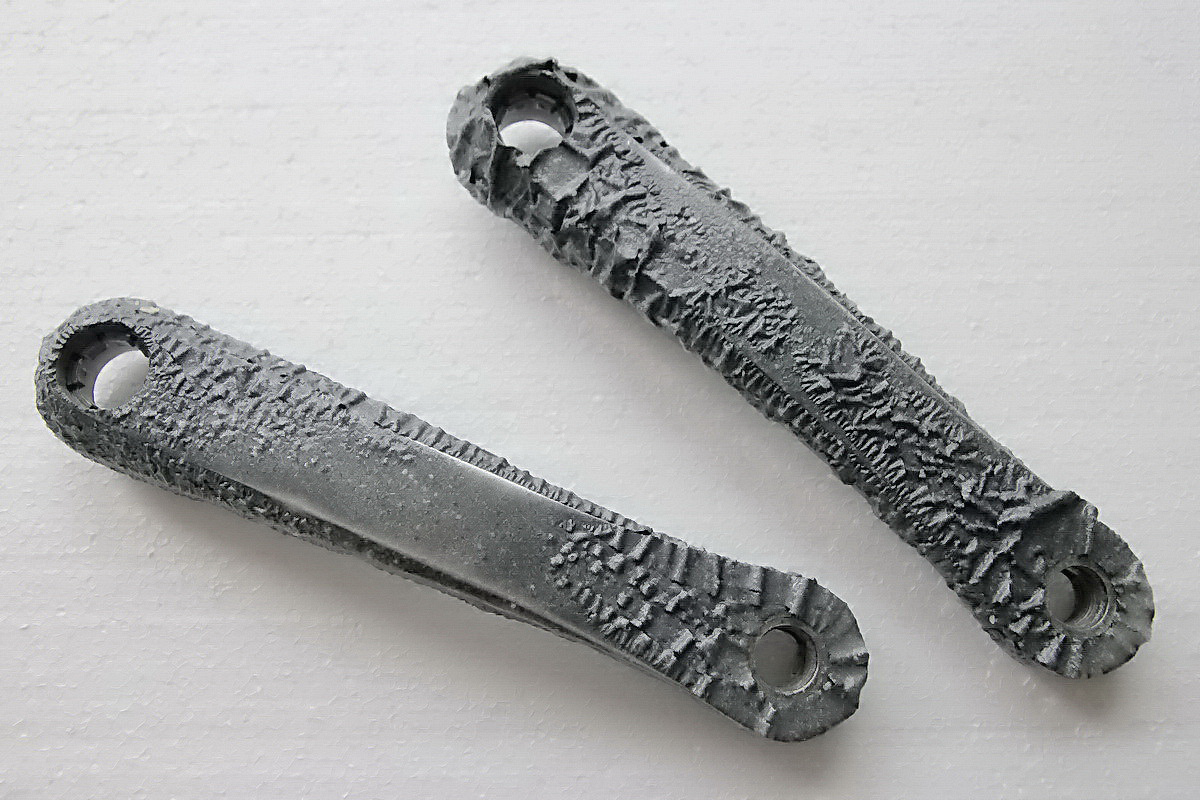
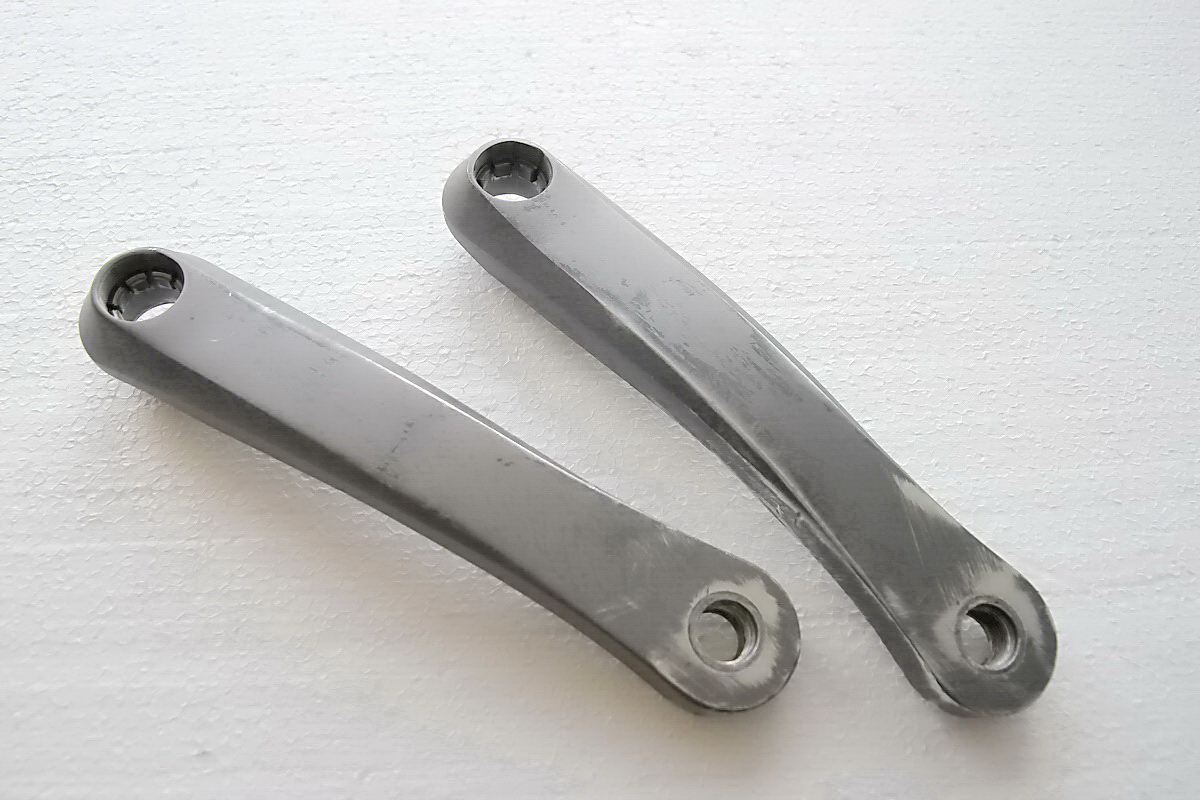
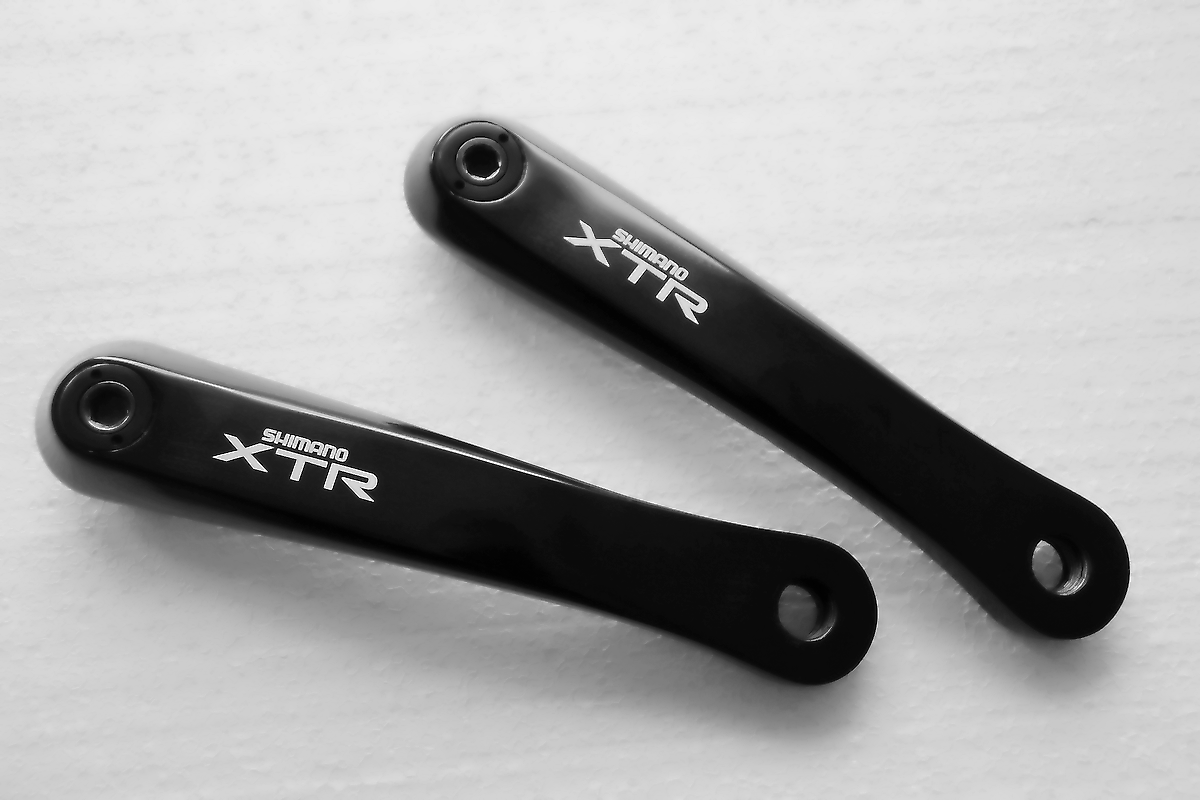
I already wrote in one of my previous blog posts that the cranks were originally painted by Shimano. Before I start anything, I clean both crank arms in warm water with a degreaser and remove old dirt and remaining grease (1). The next step of the restoration is to remove the old paintings (2). Nothing special, just use old good paint removal, which works perfectly. As per my experience, it will take some time and I need to apply paint removal in a few more rounds. When completed (...and crank arms are now paintless) I repeat cleaning in hot water with a degreaser (3). A step after is brushing (4). As you may envision, I do hand- and machine-brushing. I use several types of sand-papers. At the end of brushing, I apply to finish glaze and polishing paste (5). Again, I have a couple of different grain sizes. I always do a maximum to polish the cranks. Don`t be hurry, the better surface preparation, the better anodizing effect. Do not forget to clean the arms in warm water in the end. The next step would be anodization of the cranks (6). But even before that, cut threads for the pedals again. I obviously use the M10 hand step-screw tap. The crankset goes for black anodizing and lasering Shimano XTR logos. I request the same black anodizing for dust nuts, too. However, it`s not on me, this will be handled by my friend.
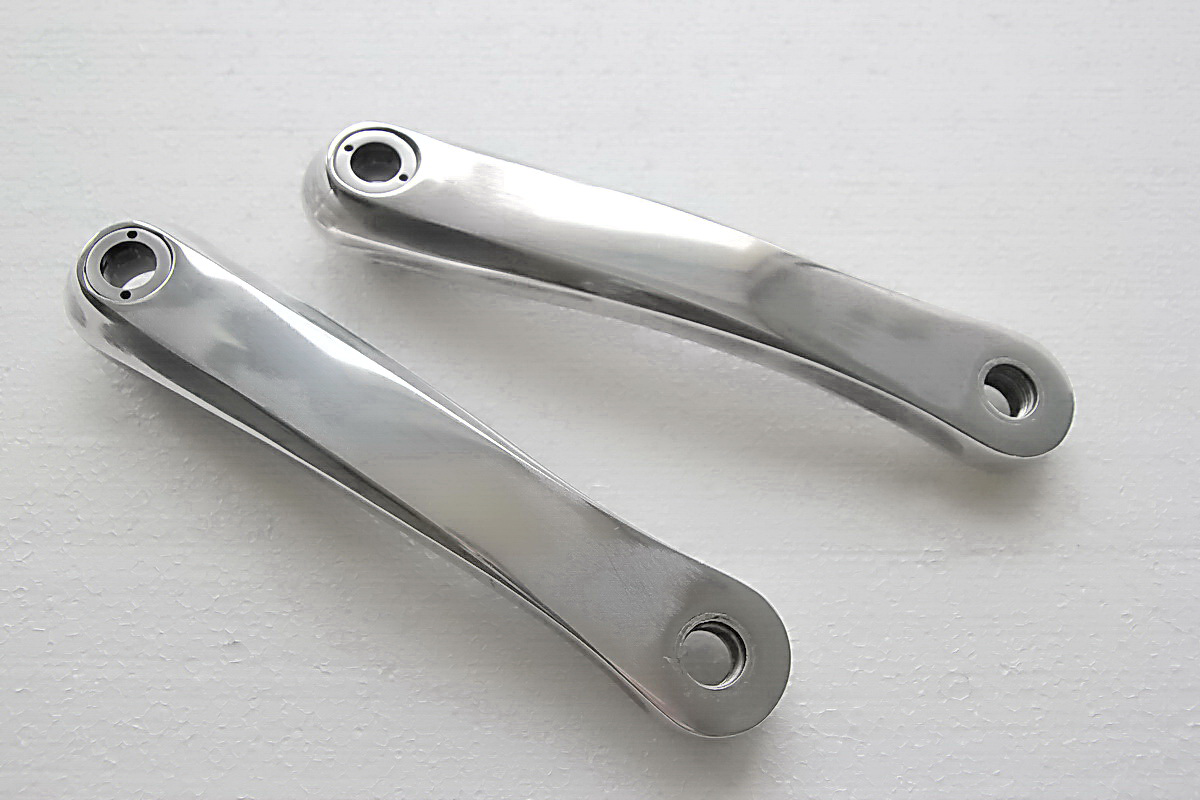
When completed and sent back to me, the last step of this restoration is crankset completion with a pair of self-extracting bolts and dust nuts, and mounting a set of XTR chainrings on the drive-side arm. Job`s done. I hope you like it. My short how-to photo story will help you with your restoration. If still complicated, don`t worry, I can help you.
What`s next? I do plan another radical restoration with chromium plating. Stay tuned.